


For added peace of mind, Beko large appliances are eligible for our 10 Year Beko Parts Guarantee
Read More 4.2 out of 5 rating from
over 44795 reviews

We are proud to be the UK's number one large home appliance brand, rated 4.2 out of 5 on Trustpilot.
94% of consumers
recommend Beko
We are proudly recommended by 94% of our customers on Feefo, an independent reviews platform with verified feedback.

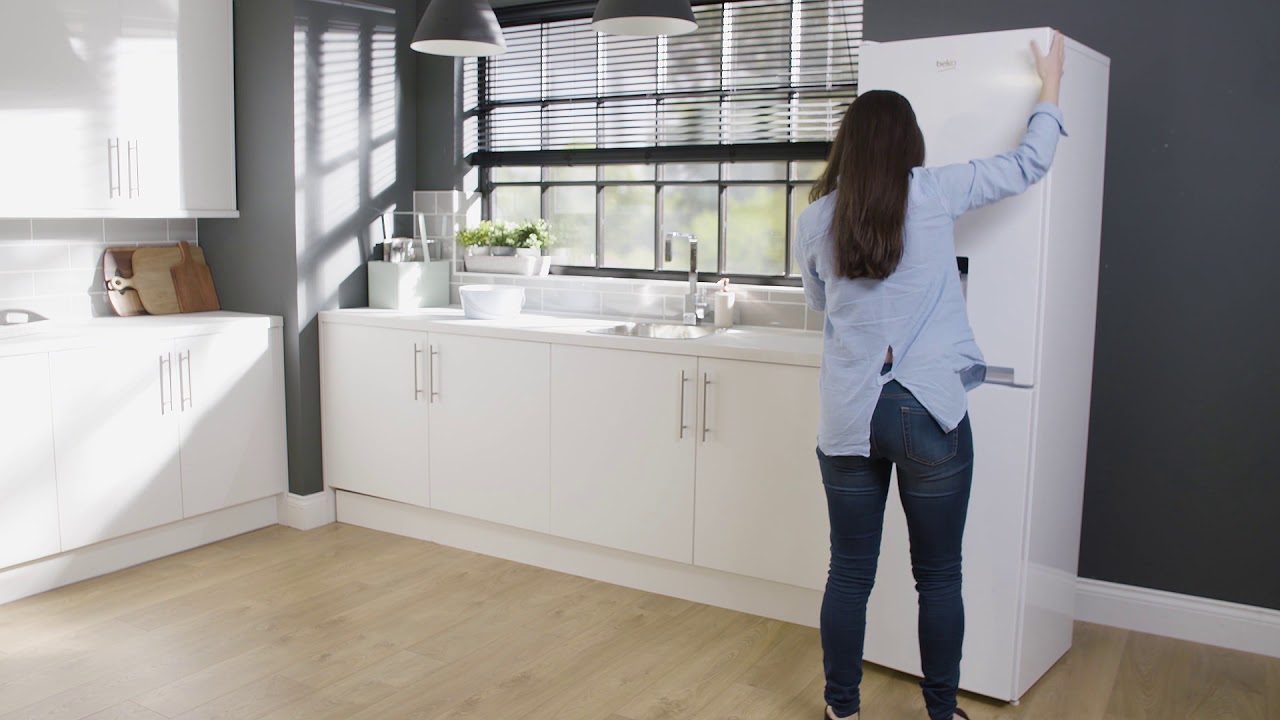
How to reverse your fridge freezer doors
Whether you’ve recently purchased a Beko fridge freezer or are redesigning your kitchen, having a fridge freezer with reversible doors is really handy. The reversible doors are useful for when you need your appliance to fit into a specific space, without compromising the ease of opening and closing your fridge freezer’s doors. We’ve put together this handy how-to guide to show you how to reverse your fridge freezer doors.

Before you start

It’s best to reverse the doors of your fridge freezer before using it for the first time, but if you’ve been using your fridge freezer already and need to switch the doors around, we recommend you unplug it, remove any food or drink from inside of it, and empty the water tank. Here are three things you should know about and do before you start:
- There are two Beko fridge freezer door types – we will show you how to know which door type you have
- Ask someone to help you with these steps
- Remove all plastic covers from your fridge freezer and place them nearby
How to check if you have door type 1
If you have Beko fridge freezer door type 1, you will be able to locate the plastic cover on the top right or left of your fridge freezer. Watch the video above to see what this looks like.
Remove the fridge door

Watch the video to see how to remove your fridge’s door. Or, follow these quick and easy steps to help you do this:
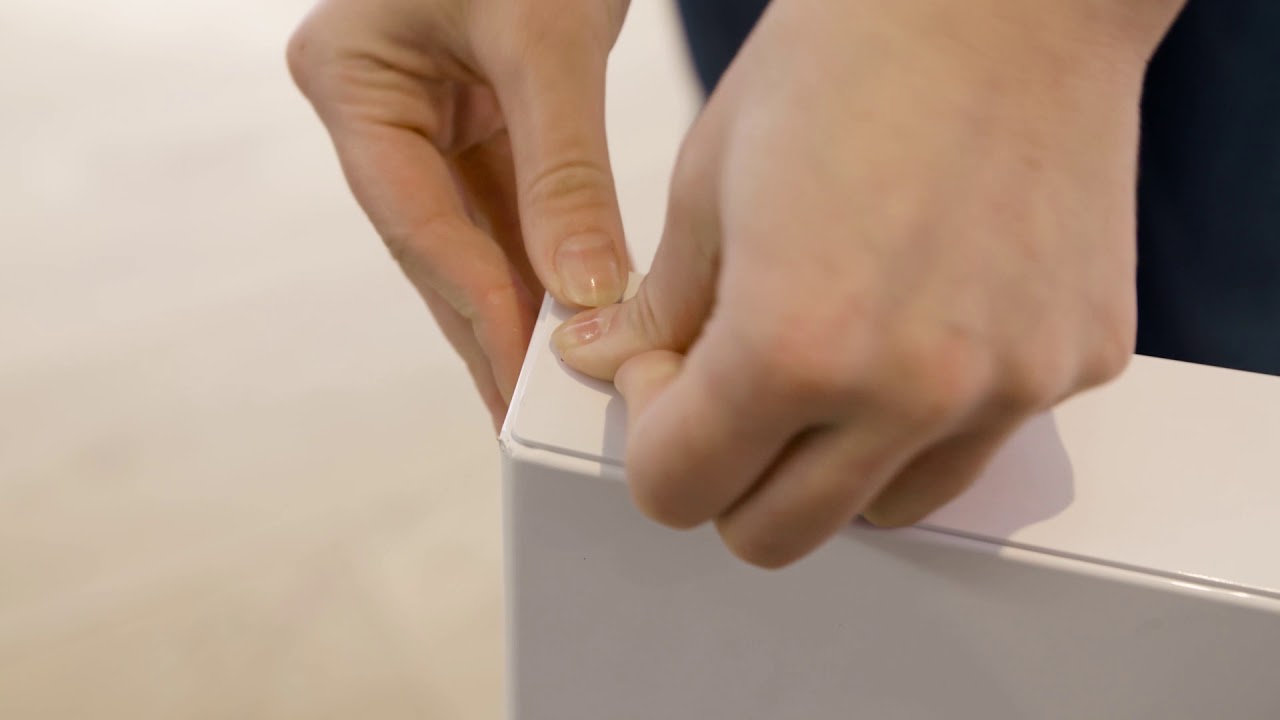
- Remove the plastic hinge cover with a screwdriver
- Unscrew the top hinge
- Lift the door upwards to unhinge, place the door and its hinge nearby
Remove the freezer door

Watch the video to find out how to remove your freezer’s door. Or, follow these quick and easy steps to help you do this:
- Unscrew the middle hinge
- Lift the freezer door upwards to unhinge, place the door and its hinge nearby
Repositioning the adjustable foot

Watch the video to find out how to reposition your fridge freezer’s adjustable foot. Or, follow these quick and easy steps to help you do this:
- Remove the bottom hinge pin with a wrench
- Reposition the hinge pin into the other pin hole
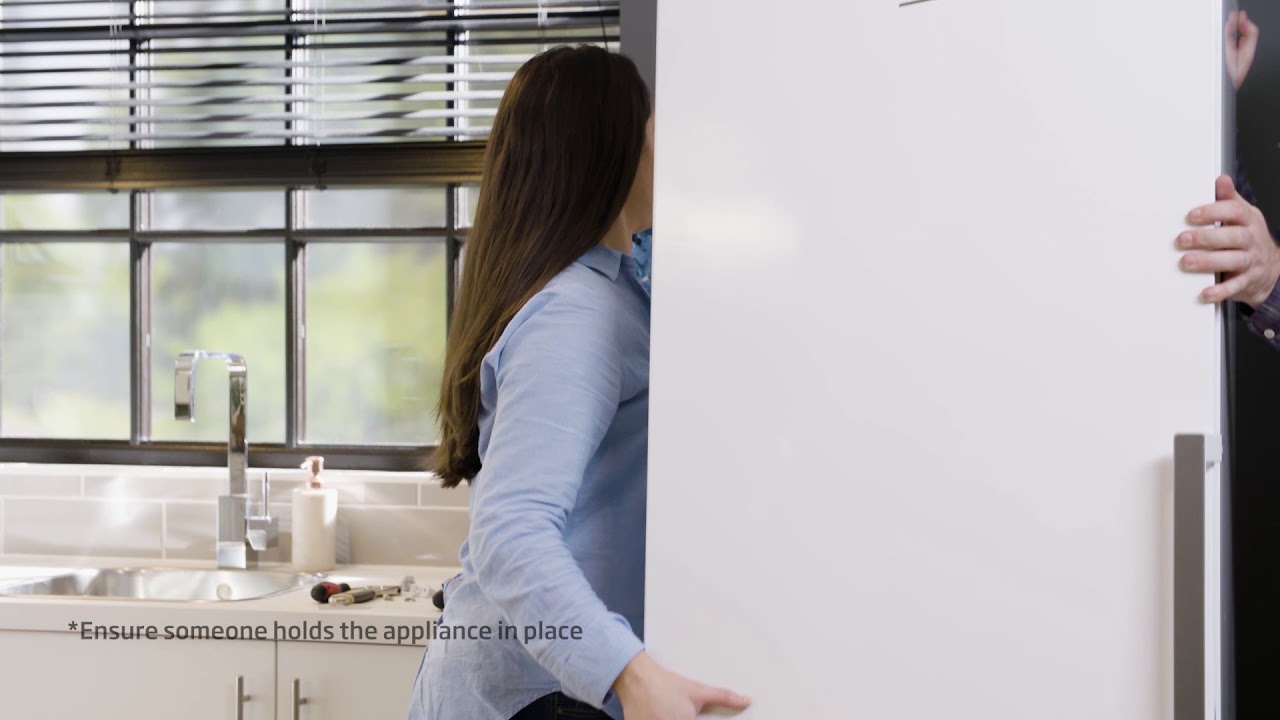
- Lean your appliance at a 45° angle, and have someone help you by holding it in this position
- Unscrew the bottom foot hinge and swap it with the adjustable foot and screws from the opposite foot
Reposition the hinge housings
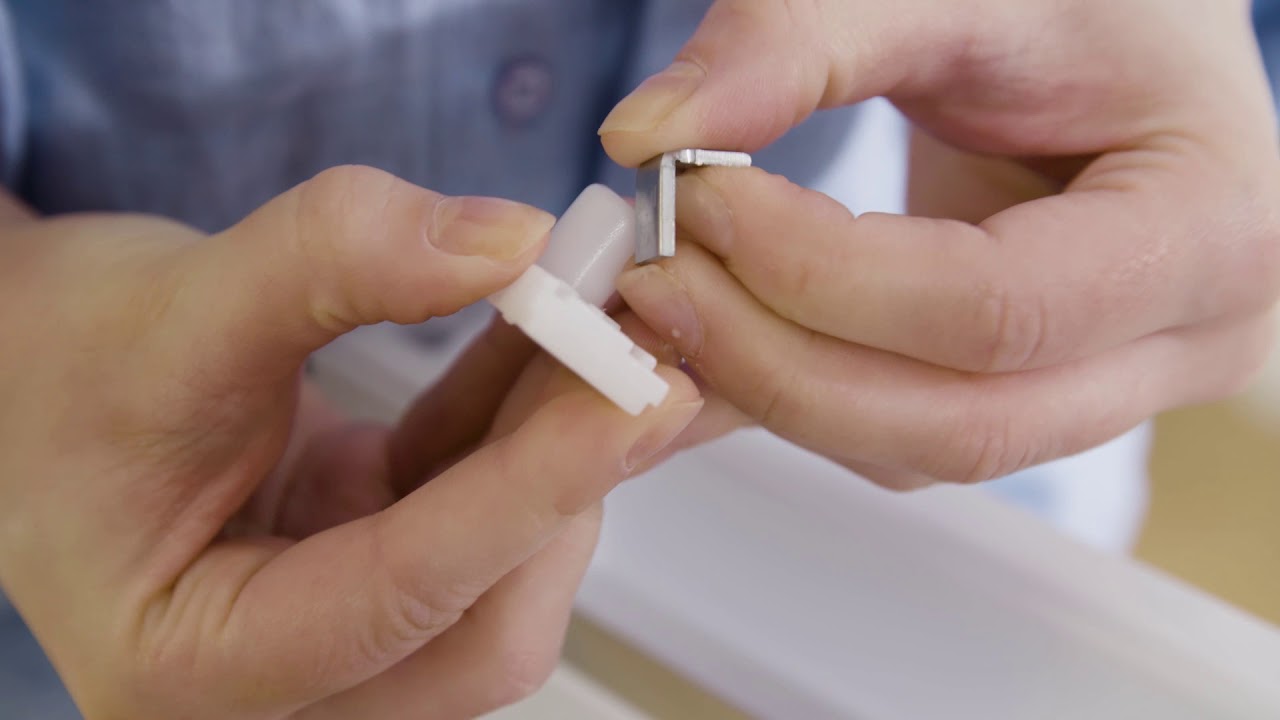
Watch the video to find out how to reposition the hinge housings. Or, follow these quick and easy steps to help you do this:
- Starting with the fridge door, remove the top hinge housing
- Reposition the top hinge housing into the opposite side of the door
- Unscrew the bottom hinge housing and stopper
- Remove the metal stopper from the hinge housing hole
- Rotate the metal stopper by 180° and reposition it into the opposite side of the door
- Repeat steps 1-5 for the freezer door
Reposition the doors

Watch the video to find out how to reposition the doors. Or, follow these quick and easy steps to help you do this:
- Hold the freezer door in position and rotate the middle hinge by 180°
- Screw it into its new position, whilst ensuring the hinge is placed in its housing
- Hold the fridge door in position
- Screw it into its new position, whilst ensuring the top hinge is placed in its housing
Reverse the handles
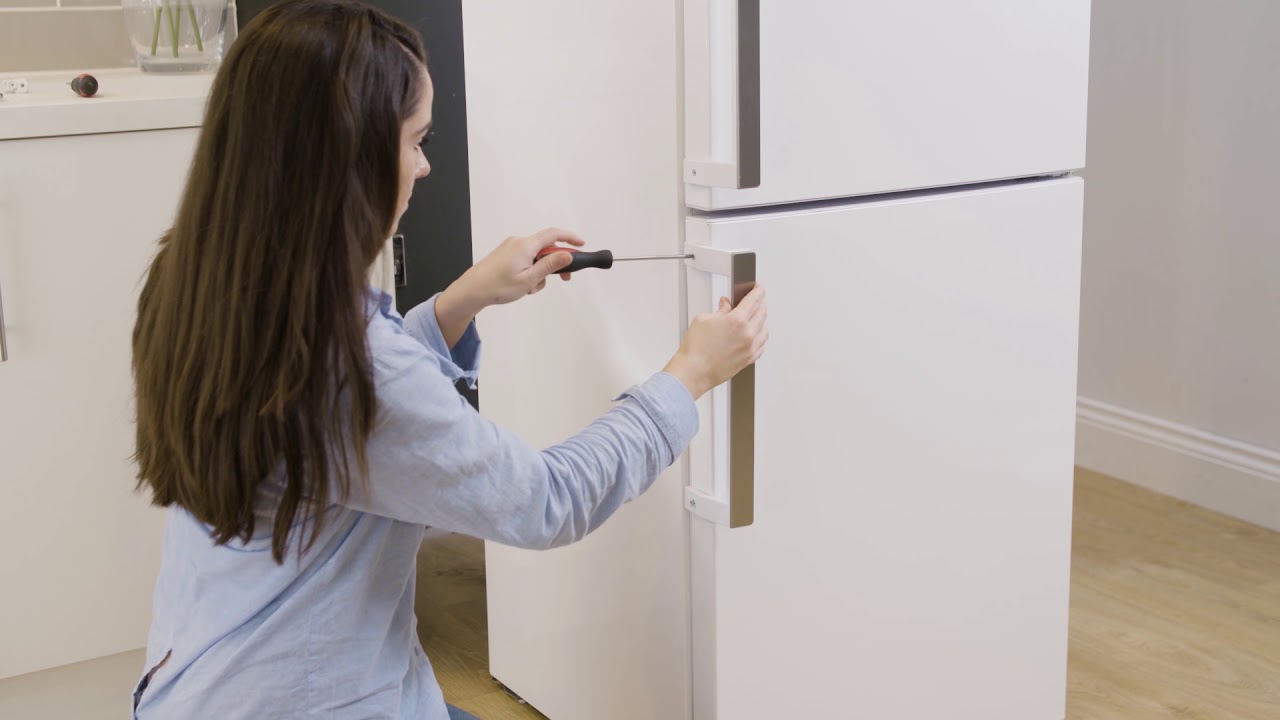
If your model has handles, watch the video to find out how to reverse the handles. Or, follow these quick and easy steps to help you do this:
- Unscrew the handles
- Flip them and screw into the opposite side
How to check if you have door type 2

If you have Beko fridge freezer door type 2, open the door and check if hinges can be located on the top and bottom of the appliance. Watch the video above to see what this looks like.
Remove the freezer door

Watch the video above to find out how to remove the freezer door. Or, follow these quick and easy steps to help you do this:
- Lean the appliance back at a 45° angle so that it is self-supported in a safe area, have someone help you by holding it in this position
- Unscrew the bottom foot hinge
- Pull the freezer door downwards to unhinge and place both the door and the hinge nearby
- Remove the adjustable foot from the opposite side
- Reposition the adjustable foot to where the hinge was before
Remove the fridge door
Watch the video to find out how to remove the fridge door. Or, follow these quick and easy steps to help you do this:
- Unscrew the middle hinge
- Lift the fridge door upward slightly to unhinge
- Place both the door and the hinge nearby
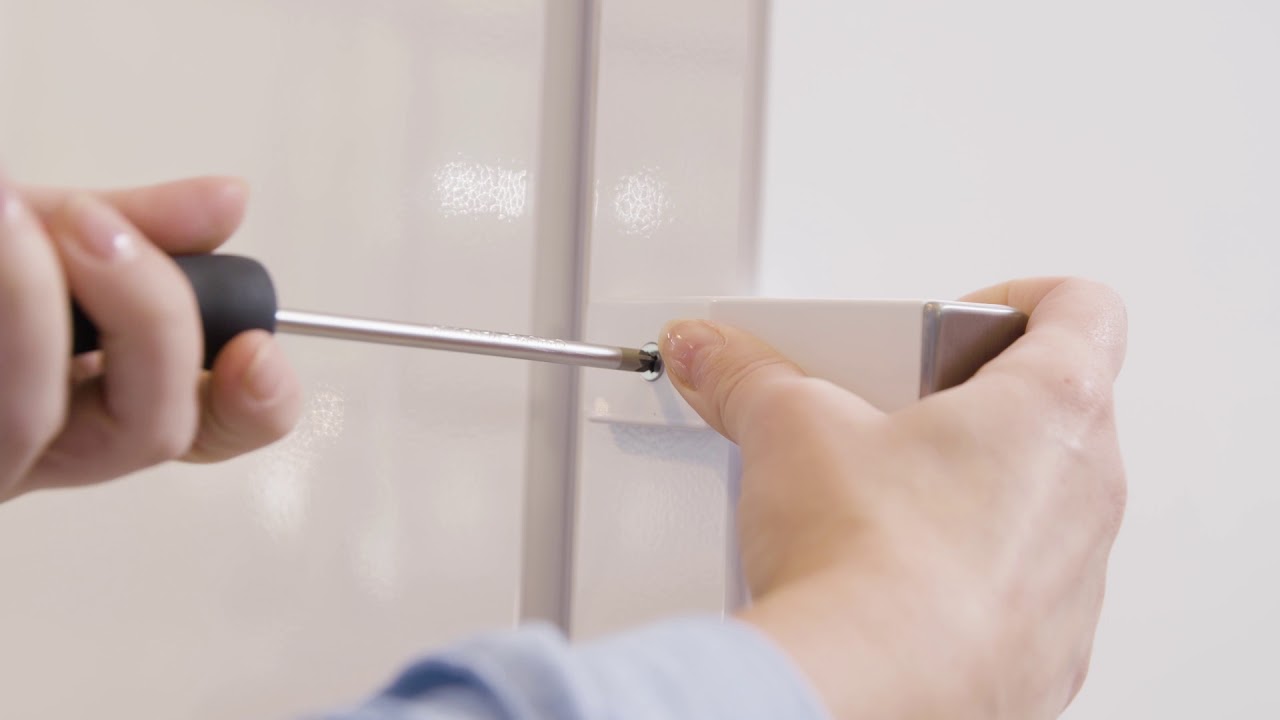
Repositioning the top hinge

Watch the video to find out how to reposition the top hinge. Or, follow these quick and easy steps to help you do this:
- Remove the hinge pin with a wrench
- Unscrew the hinge and remove the plastic trimming
- Rotate the hinge by 180° and screw it into the opposite side
- Replace the plastic trimming
- Reposition the hinge pin into the hinge so it is facing downwards
Reposition the hinge housing
Watch the video to find out how to reposition the hinge housing. Or, follow these quick and easy steps to help you do this:
- Start with the fridge door and unscrew the bottom hinge housing
- Use the bottom hinge housing which was supplied in the plastic bag with the appliance, and screw it into the opposite side
- Remove the top hinge housing and reposition it into the opposite side
- Repeat this for the top hinge housing of the freezer door
- Unscrew the stopper
- Remove the bottom hinge housing
- Reposition the bottom hinge housing and stopper into the opposite side
- Screw in the stopper
Reposition the doors
Watch the video to find out how to reposition the doors. Or, follow these quick and easy steps to help you do this:
- Hold the fridge door in position while you rotate the middle hinge by 180°
- Screw it into its new position whilst ensuring the hinge is placed in its housing
- Lean the appliance back at a 45° angle so that it is self-supported in a safe area, have someone help you by holding it in this position
- Hold the freezer door in position while you screw in the bottom foot hinge, ensuring it is screwed into its housing
Reverse the handles
If your model has handles, watch the video to find out how to reverse the handles. Or, follow these quick and easy steps to help you do this:
- Unscrew the handles
- Flip them and screw into the opposite side
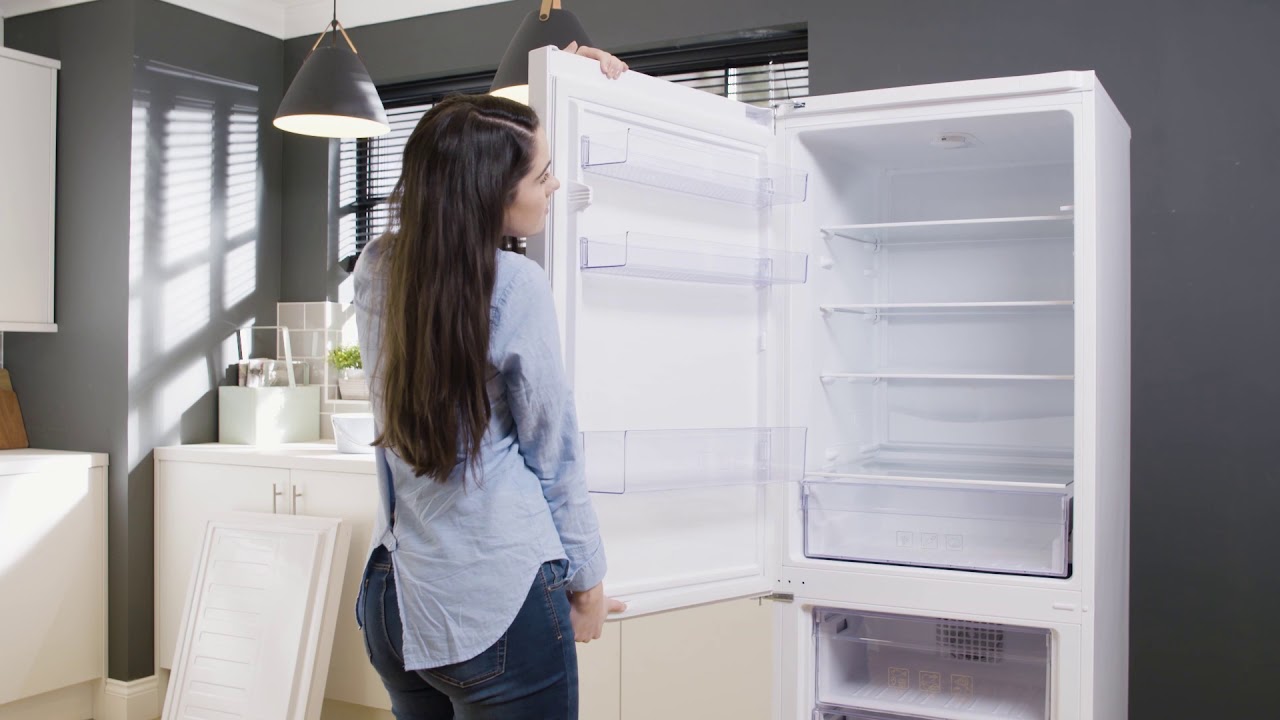
After reversing your fridge freezer doors
Now that you have successfully reversed your fridge freezer doors, there are just a few more steps to finish off with:
- Carefully stand the appliance upright and, if necessary, adjust the two front feet to balance it
- Check that all the hinge screws are tightened, but avoid over-tightening
- Replace all of the plastic covers
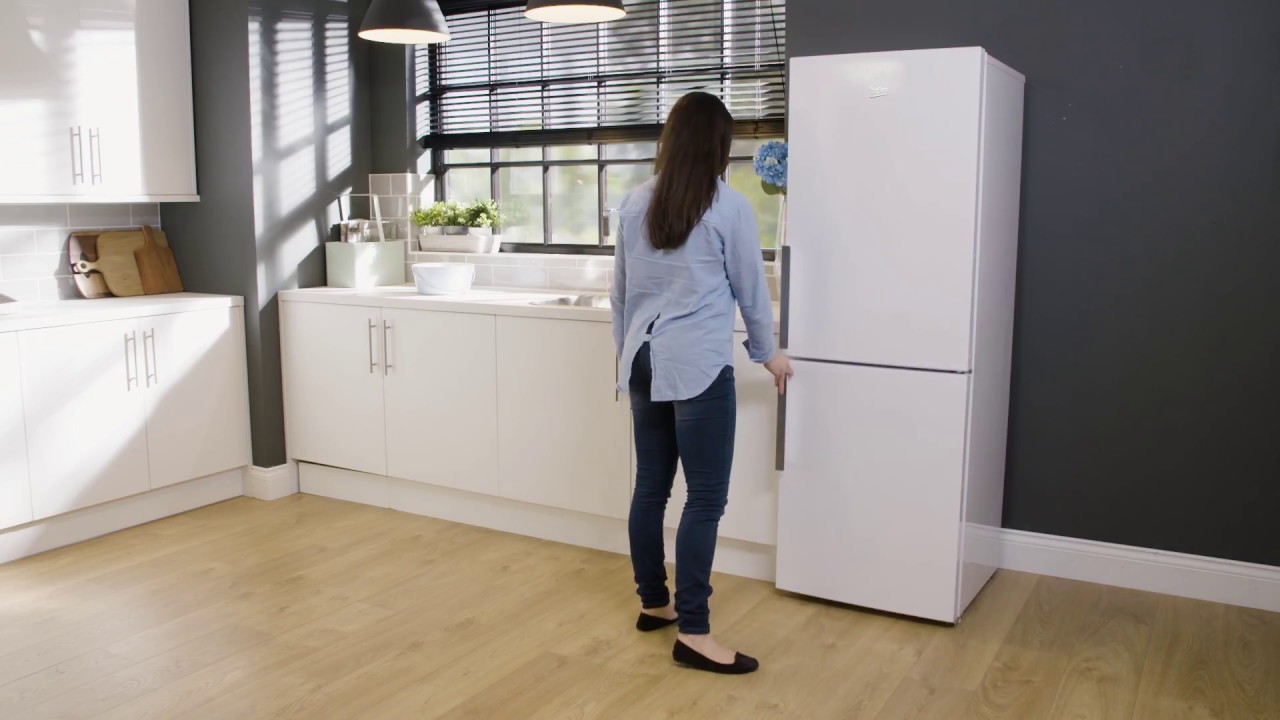
- Ensure that the doors open and close easily
- Ensure that the doors are aligned correctly and that there are no gaps that would allow air to enter the interior
- Wait a minimum of four hours to allow the system to settle before switching it on
- Switch on the appliance and allow for the temperatures to optimise
If you have any questions regarding these steps please feel free to contact our customer service team with the model and serial number of your fridge freezer. They will be happy to assist to you. Alternatively, if you are looking to purchase a new appliance, explore our full range of fridge freezers, which included both integrated fridge freezers and integrated fridges.
Did you find this How-To guide useful?
Thank you for your feedback and we are sorry this How-To Guide wasn’t useful to you. If you would like further assistance, please head over to our Contact Us page.
Need Product Support?
If you have any questions about your Beko appliance, we are here to help. Finding answers and information is easy with Beko’s helpful online resources, simply browse our product support topics below and select the one that is relevant to you.

Manuals
Beko manuals contain helpful information and advice about your appliance.
View Manuals
Parts & Accessories
We stock genuine Beko spare parts and accessories for all of our models.
View Range Now
FAQs
Browse the most asked questions about our product range.
Search FAQs
Repairs
Information on our professional repair services.
View Repairs